Deploy Flask Application on Heroku
November 01, 2022
/
7 min read
--- views
•
--- comments
Introduction
This tutorial will show you how to deploy a simple Python Flask Application on Heroku step by step.
Here is a demo of what we are going to build: https://flask-app-arlenx.herokuapp.com/.
Here is the link to the repository of the final project: https://github.com/arlenxuzj/flask-app.
This tutorial assumes that you have:
- A GitHub Account.
- A Heroku Account.
- Git installed locally – See the installation guides for Git.
- Python version 3+ (Recommend 3.10+) installed locally – See the installation guides for OS X, Windows, and Linux.
Check Git and Python installed by run command in Terminal below:
# Check Git version
$ git version
git version 2.32.1 (Apple Git-133)

# Check Python version
$ python --version # or python3 --version
Python 3.10.3

# Check pip version
$ pip --version # or pip3 --version
pip 22.2.2
Get Started
Create Application Directory
# Create Directory and move into
mkdir flask-app && cd flask-app
Create Virtual Environment
Use the follow commands to create and activate the virtual environment:
# Create a Python Virtual Environment called flask-app
$ python3 -m venv venv

# Activate flask-app Virtual Environment
$ source venv/bin/activate
Then, you can list the installed python libraries by command:
$ pip list
pip        22.0.4
setuptools 58.1.0
Since it is a new virtual environment, there is no library installed yet except pip itself and setuptools.
Install Flask and Gunicorn
Within the activated environment, use the following command to install Flask and Gunicorn:
$ pip install Flask gunicorn
Finally, deactivate and reactivate the virtual environment:
$ deactivate && source venv/bin/activate
Simple Flask Application
Hello World!
First, we need to create an entry file of our Flask Application.
mkdir src && touch src/app.py && code .
The command above will create a file called app.py in the src directory and open the entire directory flask-app in VS Code.
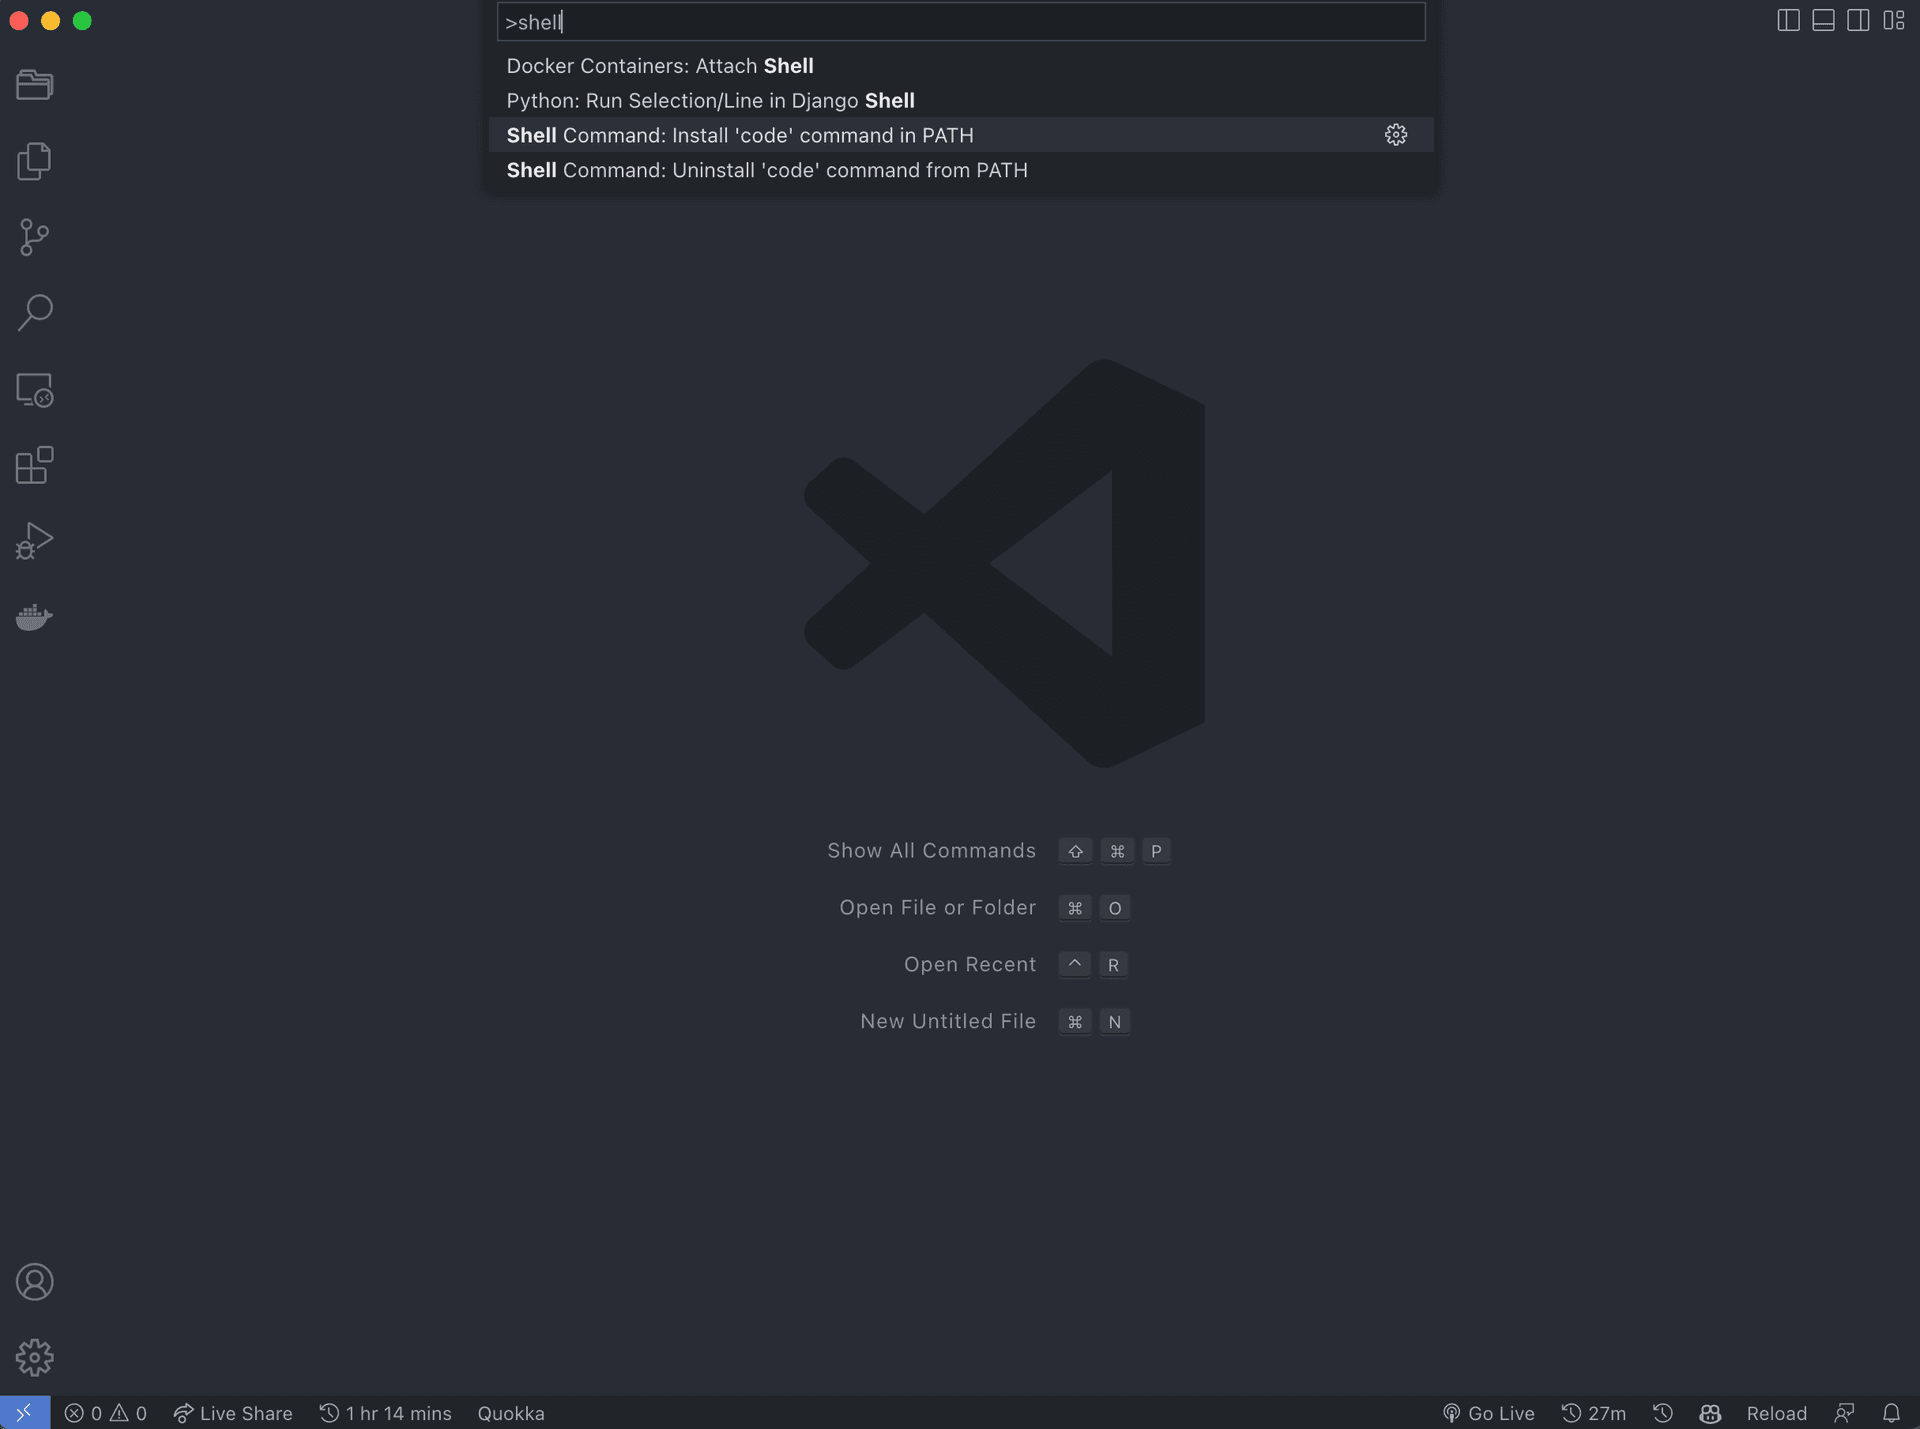
If you see something like command not found: code in the Terminal, open VS Code normally and access its Command Palette by Shift+Command+P (Mac) / Ctrl+Shift+P (Windows/Linux). Next, type shell, choose Shell Command: Install 'code' command in PATH, and hit ENTER.
Then, go back to Terminal and run command code . again.
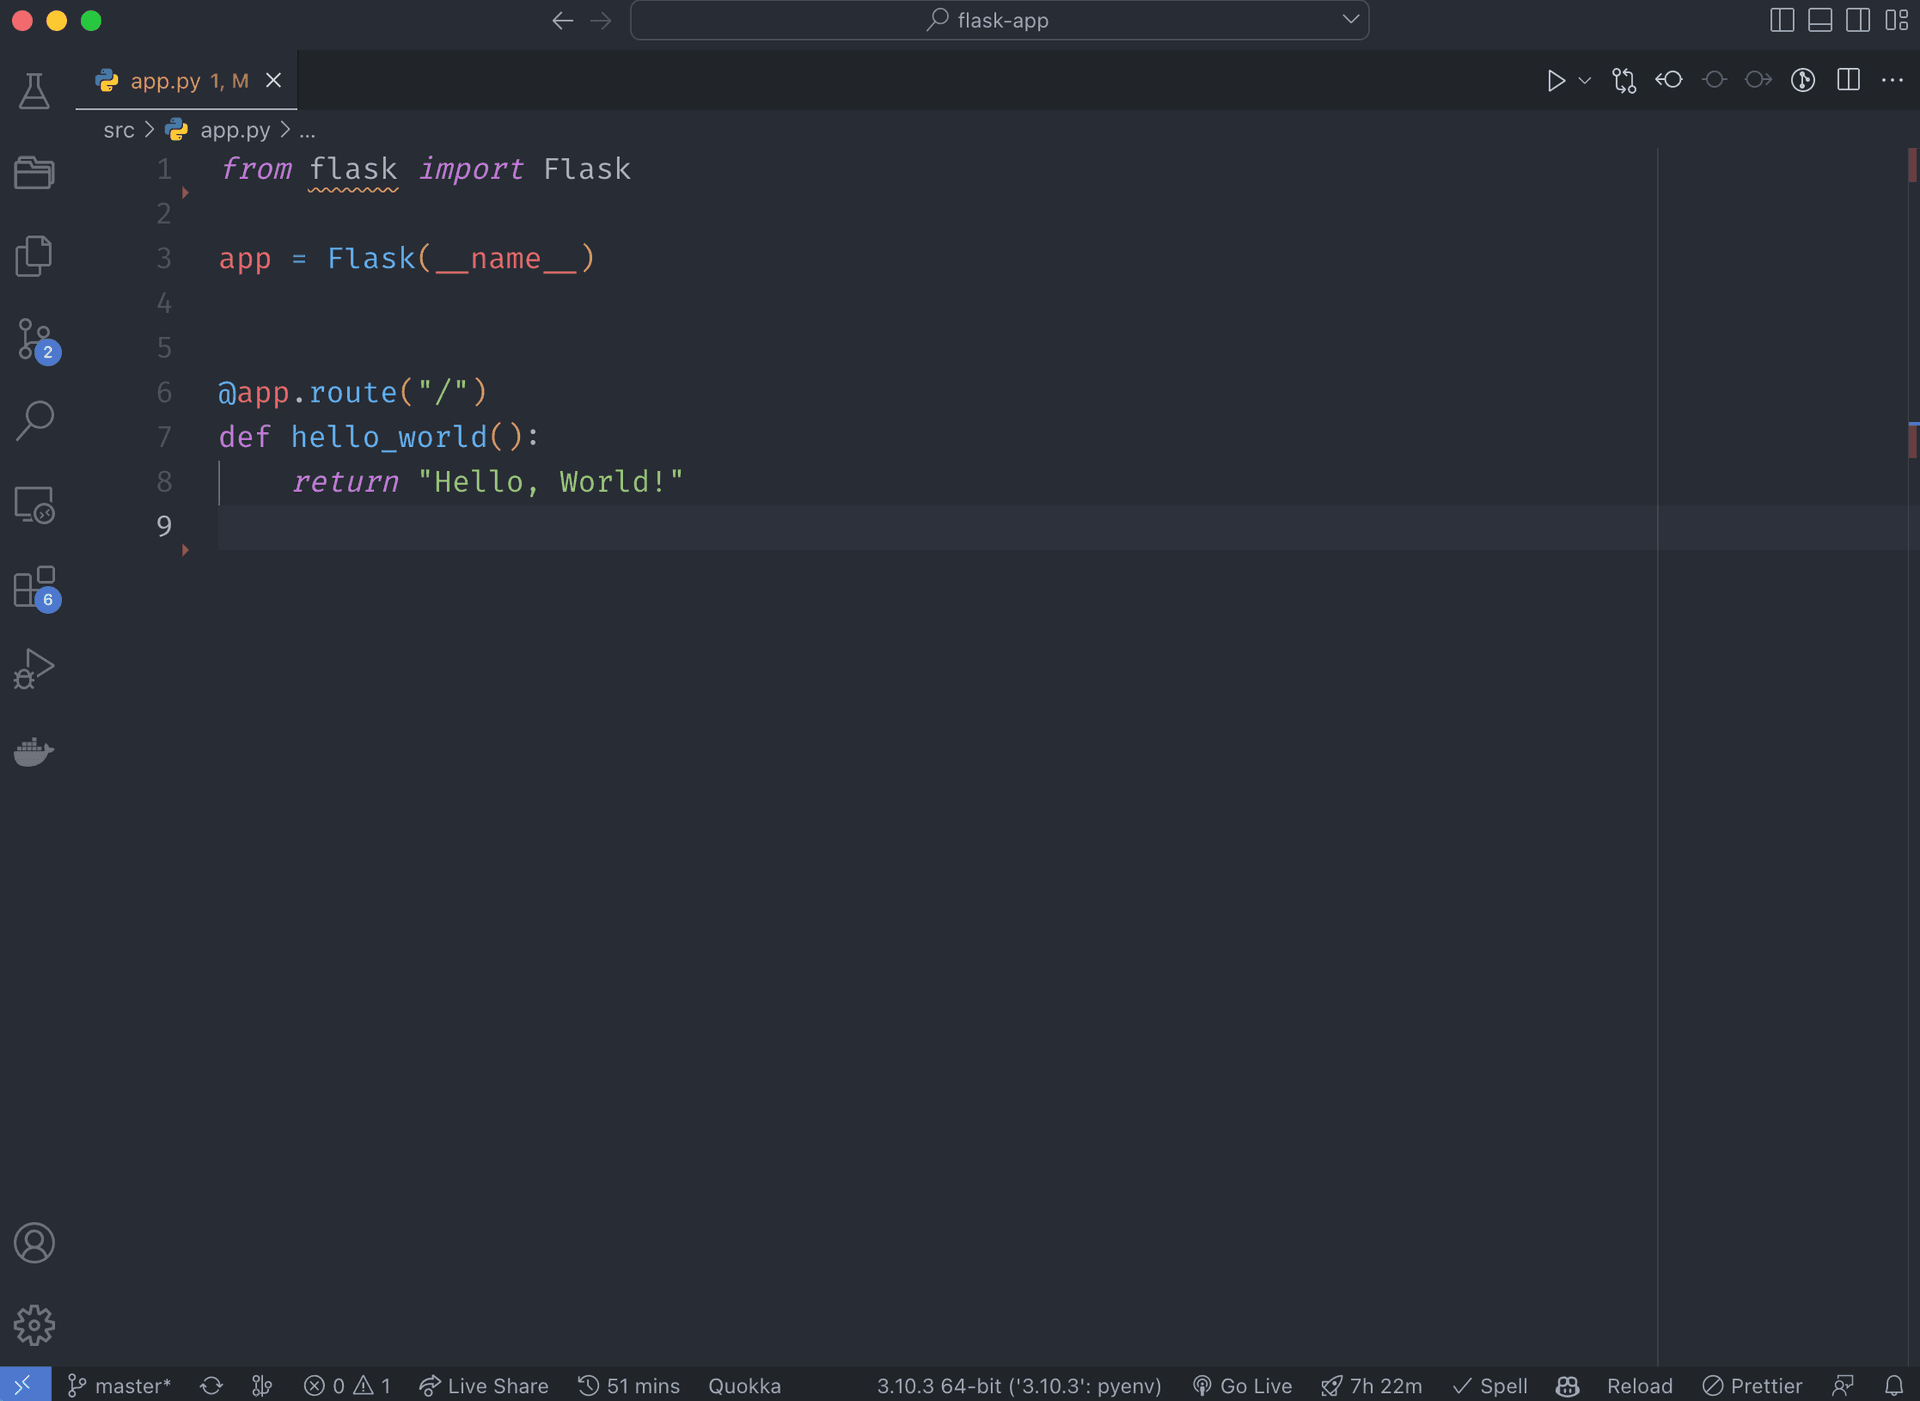
Next, copy and paste the following code to src/app.py file.
src/app.py
from flask import Flask

app = Flask(__name__)

@app.route("/")
def hello_world():
    return "Hello, World!"
To run the flask application, use the flask command. The path of our application entry file need to be provided with the --app option:
$ flask --app src.app run
 * Serving Flask app 'src.app'
 * Debug mode: off
WARNING: This is a development server. Do not use it in a production deployment. Use a production WSGI server instead.
 * Running on http://127.0.0.1:5000
Then you can copy the URL http://127.0.0.1:5000 to your favorite browser, and you can see the text Hello, World! in the browser screen.
If you find a wave line under the flask in the line 1 in VS Code,
you can
-
Click Area 1 in the footer of the VS Code.
-
Click
Python 3.x.x ('flask-app')in Area 2 to choose the python interpreter of the virtual environment.
Prepare to Deploy
At the end of this section, your folder structure should be like this:
/flask-app
  /src
    app.py
  .gitignore
  Procfile
  Requirements.txt
-
Run the command to freeze the python libraries in order to let Heroku know which need to be installed in the build step after deploy the application:
pip freeze > requirements.txt -
Create a new file
Procfilein the project root directory (flask-app). Copy and paste following line to this file:web: gunicorn src.app:appHeroku will run the command
gunicorn src.app:appafter the application build successfully. -
Create a new file
.gitignorein the project root directory (flask-app) and copy and paste the entire file from here.
Push Code to GitHub
Before push your code to GitHub, you should
- Create a repo called
flask-app.- DO NOT select Initialize this repository with a README, it will be easy for later steps.
- Connecting to GitHub with SSH.
After you create a repository in GitHub, you will see some instruction in the screen. If you config the SSH setting correctly, run the following commands one by one in the Terminal (inside project directory):
git init
git add -A
git commit -m 'first commit'
If you never use Git before, you cannot commit before you config your Git name/email. Run the following commands in the Terminal:
git config --global user.name "YOUR_NAME"
git config --global user.email "YOUR_EMAIL"
Then, commit again and push your code from the local machine to the remote repository:
git commit -m 'first commit'
git branch -M master
# Find your username in GitHub
git remote add origin [email protected]:username/flask-app.git
git push -u origin master
Deploy Application on Heroku
-
Create a new app in Heroku.

-
Go to Deploy Tab.
-
Choose GitHub Deployment method.
-
Type
flask-appto search for a repository to connect. (You need to connect your GitHub account in the first time). -
Click Connect.

-
Click Enable Automatic Deploys.
-
Click Deploy Branch.

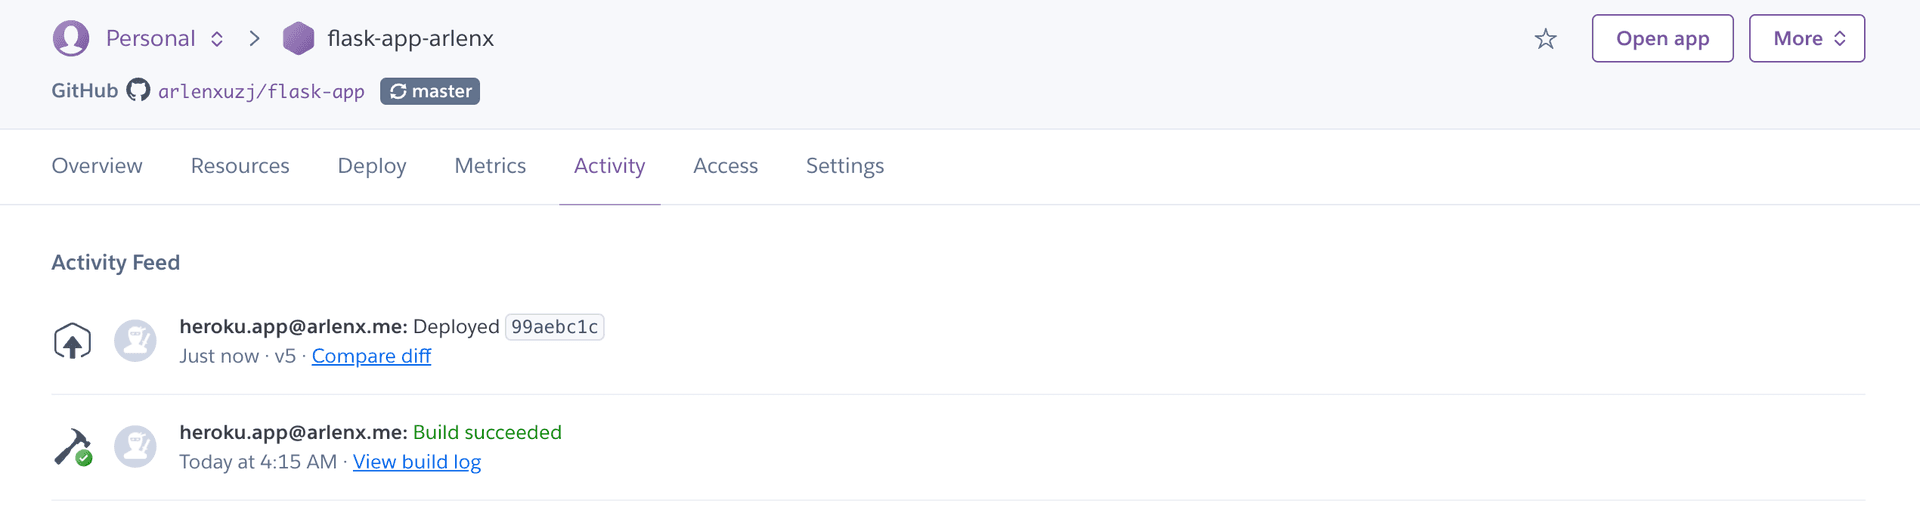
-
Wait for the building and click Open app after build successfully. You can find the build status in the Activity Tab.

You can see the text Hello, World! in the browser screen. Now, your application appears on the Internet and everyone can access this application by the URL show in the browser!
Second Router
Dynamic Router
Let us add a new router call hello with a specific URL path syntax. This is called Dynamic Router. If you go to http://127.0.0.1:5000/stranger, you will see Hello, stranger!. If you go to http://127.0.0.1:5000/arlenx, you will see Hello, arlenx!.
src/app.py
  from flask import Flask
+ from markupsafe import escape

  app = Flask(__name__)

  @app.route("/")
  def hello_world():
      return "Hello, World!"

+ @app.route("/<name>")
+ def hello(name):
+     return f"Hello, {escape(name)}!"
Deploy Again
Now, push our new code to GitHub by following command:
git add -A
git commit -m 'dynamic router'
git push origin master
In Heroku dashboard, you can find that a new deployment ran automatically. Click Open the app to check the new change of the application.